Introduction
A DOI (Digital Object Identifier) is a permanent, citable link to a research artifact. Once assigned, it always resolves to the same landing page, so others can find, cite, and credit the work reliably over time.
This document walks you through how to post a data DOI for CBI sponsored work using LabKey.
Why this matters
CBI gets credit for only about half of its actual output. Posting your data DOIs correctly is the fix, and it fulfills the DOE expectation for our data to be findable and usable.
Over the last ten years, CBI has received credit for only about half of its actual output. Many of our DOIs, involving publications, patents, datasets, and other artifacts, are disparate, not flagged correctly, or never entered into OSTI.gov at all. As a result, a large portion of CBI’s work is not visible to the DOE systems that matter, and program managers cannot get a good handle on the work that CBI and other BRCs have been doing.
At the direction of our sponsors, the BRCs have created a shared research objective (SRO) to remedy this situation. The result of this effort is the website Bioenergy.org. This website is where our program managers will assess the progress of the various BRCs, and is also shown in our annual peer review. Therefore, populating Bioenergy.org is important, especially in a new AI-driven and data-first world.
Making our data readily available is also an important service to the broader scientific community. DOE expects our data to be FAIR (Findable, Accessible, Interoperable, and Reusable), and increasingly favors data DOIs. For these reasons, posting your data correctly should no longer be treated as an afterthought to publishing. It is both how CBI demonstrates its productivity and how we deliver on our obligation to make publicly funded research usable by others.
The easiest way to make this happen is through our existing LabKey Data repository. Utilizing LabKey allows us to quickly deliver the CBI specific metadata to OSTI when a DOI is created to ensure that it is findable and accessible through Bioenergy.org. If an artifact isn’t entered and flagged correctly in LabKey, it doesn’t reach Bioenergy.org, it isn’t findable or usable by others, and CBI doesn’t get credit for it.
What can become a data DOI?
Any data artifact made possible or created through CBI funding can become a data DOI. This is not optional. Per the CBI Data Management Plan, BER requires data management and data sharing from all DOE-funded work. All Principal Investigators are expected to upload key datasets to the LabKey system in a timely manner, and posting and flagging your data correctly in LabKey is what ensures CBI receives credit for your work.
Required Metadata
To enter your data and create your DOI, you’ll need to provide four pieces of metadata: Title, Authors, Keywords, and Description
Gather the following before you begin the walkthrough:
| Field | Description | Example |
|---|---|---|
| Title | Descriptive name of the dataset | Geographic Distribution of Populus trichocarpa Genotypes by ADMIXTURE Ancestry |
| Author(s) | Author(s) separated by a comma | Mallory Morgan, Doug Hyatt, Gerald Tuskan, Daniel Jacobson |
| Keywords | Always include CBI, AND one of the four categories from the bioenergy research centers: Feedstock Development, Deconstruction and Separation, Conversion, Sustainability | CBI, Feedstock Development |
| Description | Full Description of your dataset | An interactive map showing Populus trichocarpa GWAS population structure estimated by ADMIXTURE (k=3, selected as optimal from k=2-11). Sampling locations are colored by their predominant ancestry proportion among the three inferred populations and geographic origins are searchable by genotype or river system using the search bar. |
Preparing Your Data in LabKey
The step-by-step instructions for entering your metatadata and files are provided below. This information is used to create the data DOI and will be pulled automatically into Bioenergy.org.
Click any step below to expand or collapse it.Step 1: Log into LabKey and navigate to the relevant PUBLIC_DATA folder
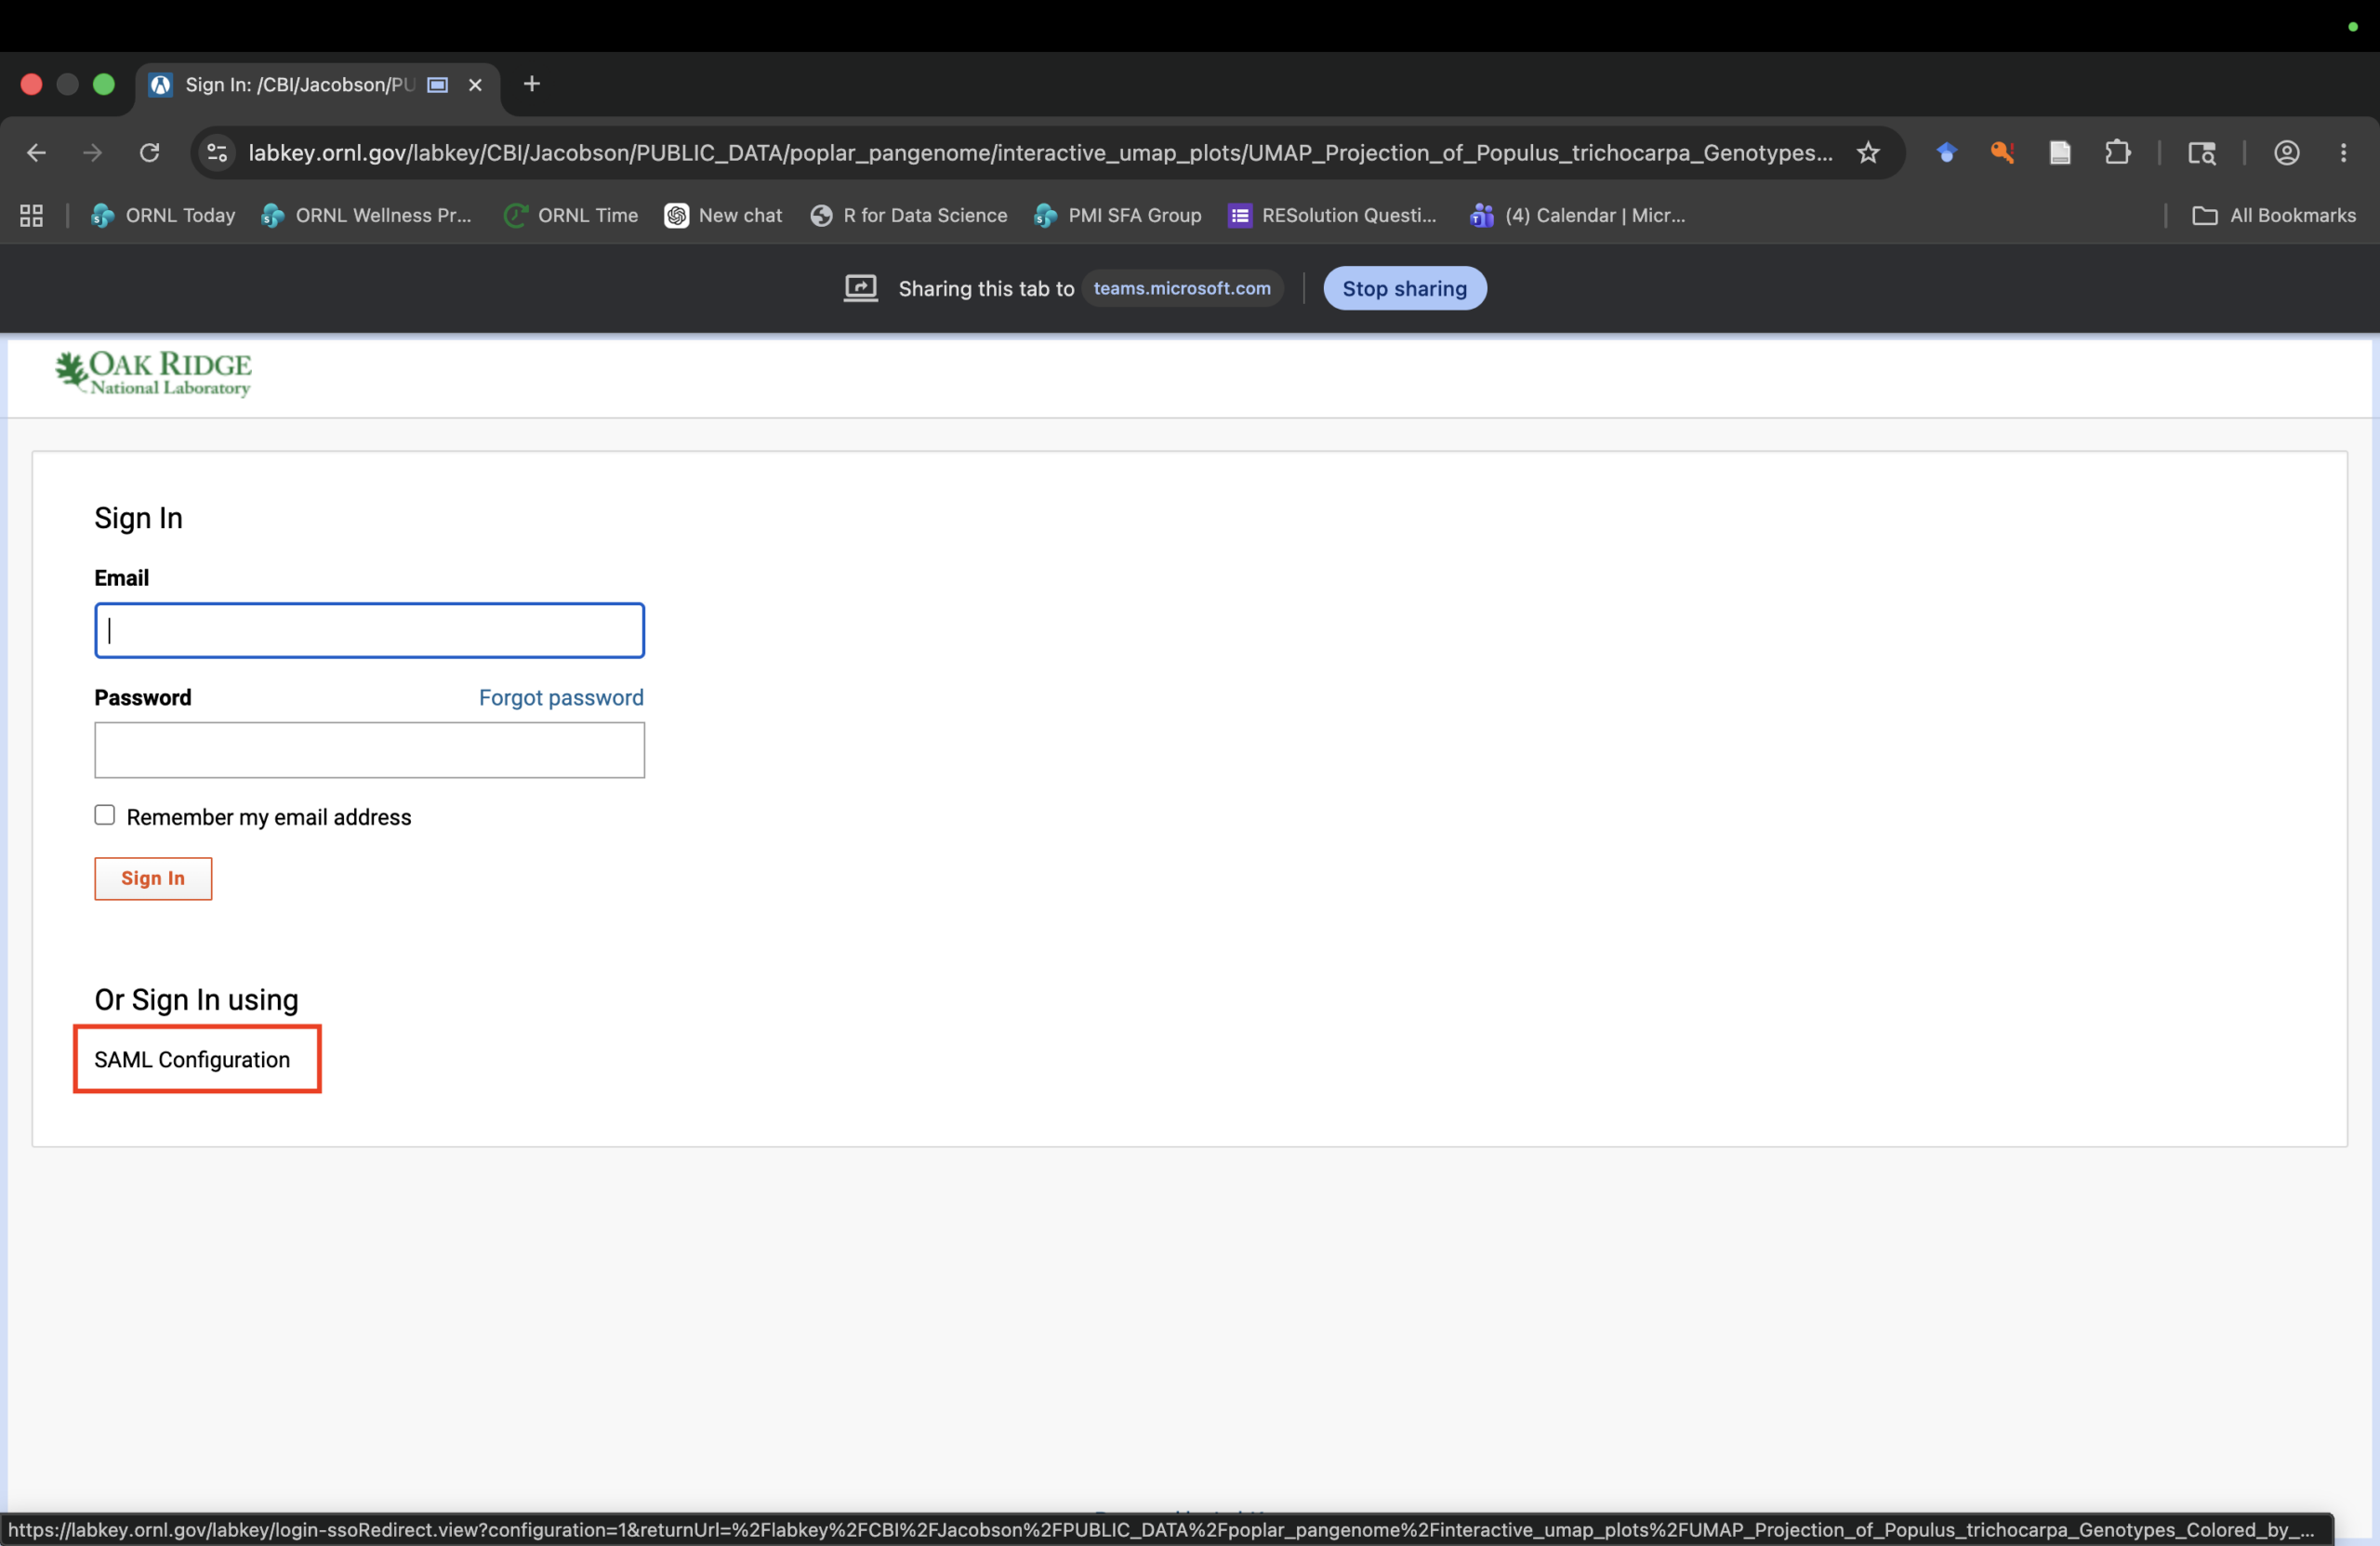
Step 1.1: Log in to LabKey
ORNL Users ONLY: Log in via SAML Configuration (Using your three-character and UCAMS password)
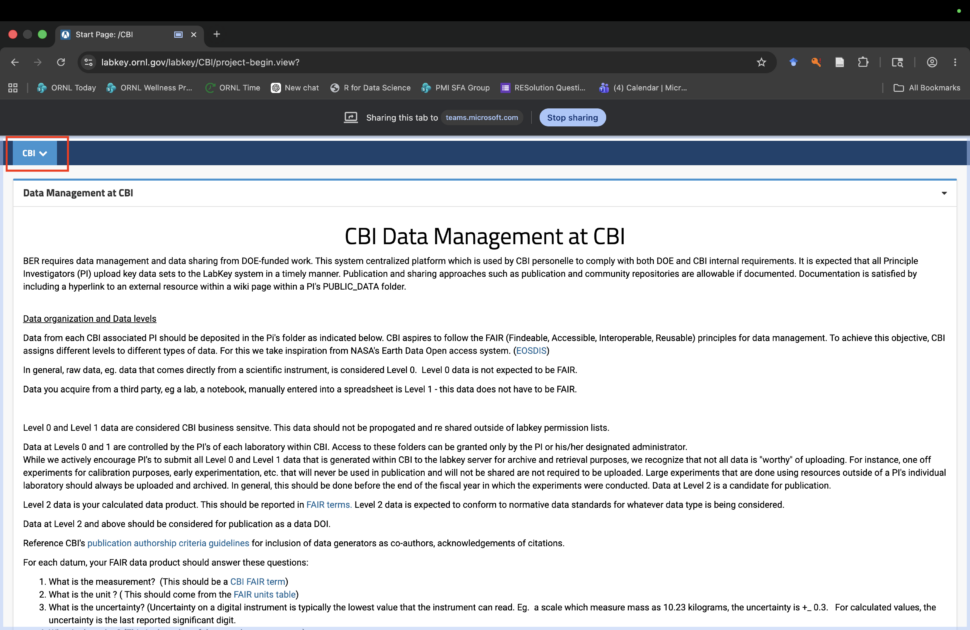
Step 1.2: Navigate to the CBI folder
Navigate to the CBI folder. The landing page hosts the CBI Data Management Plan.
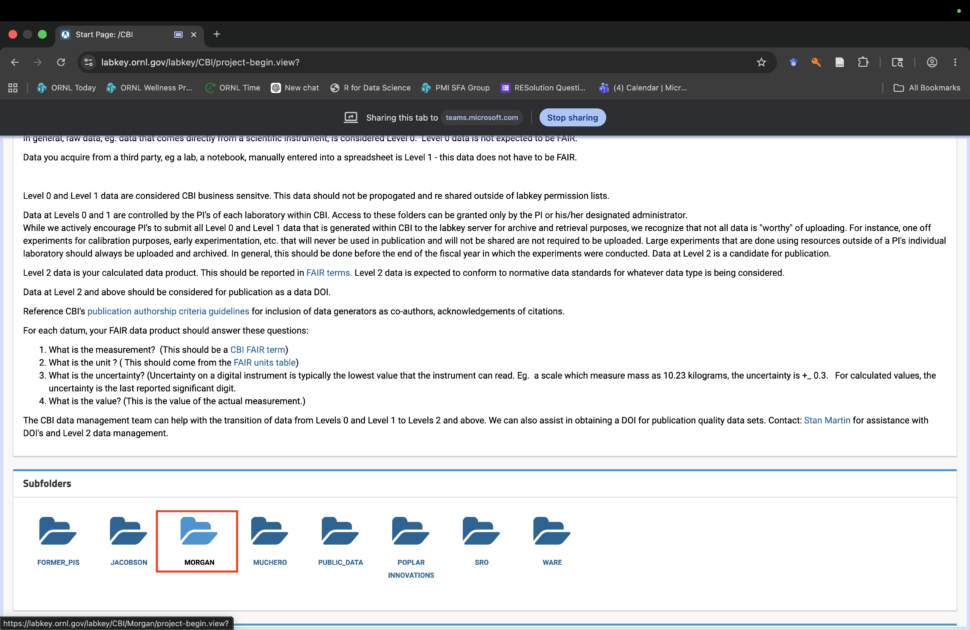
Step 1.3: Navigate to your group folder
Scroll down and select your group. These are organized by PI last name. If you do not see the group you need, reach out to Stan Martin ([email protected]) to give you permission.
Step 1.4: Navigate to your group’s PUBLIC_DATA folder
Enter the PUBLIC_DATA subfolder for your group.
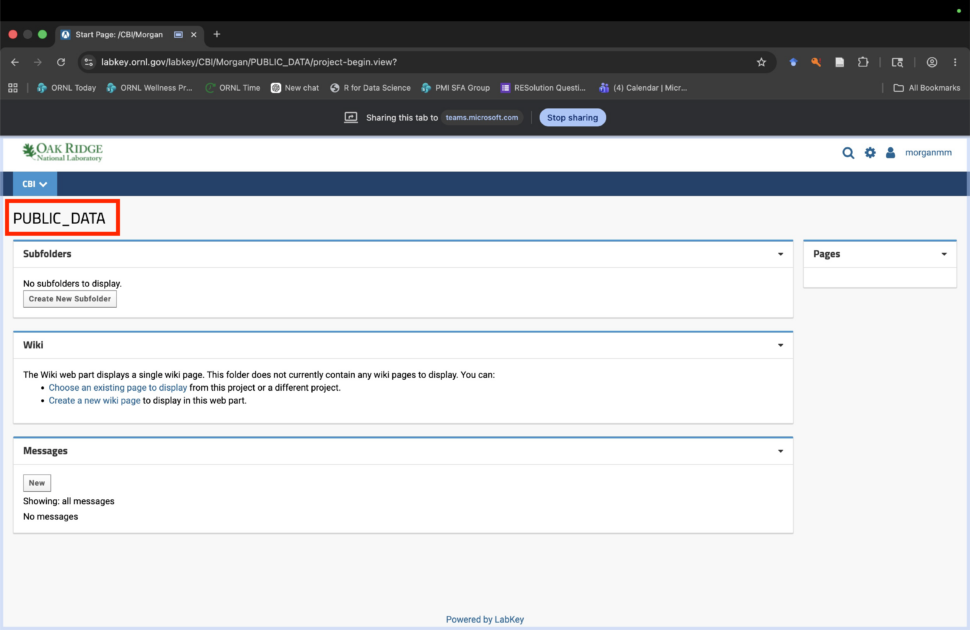
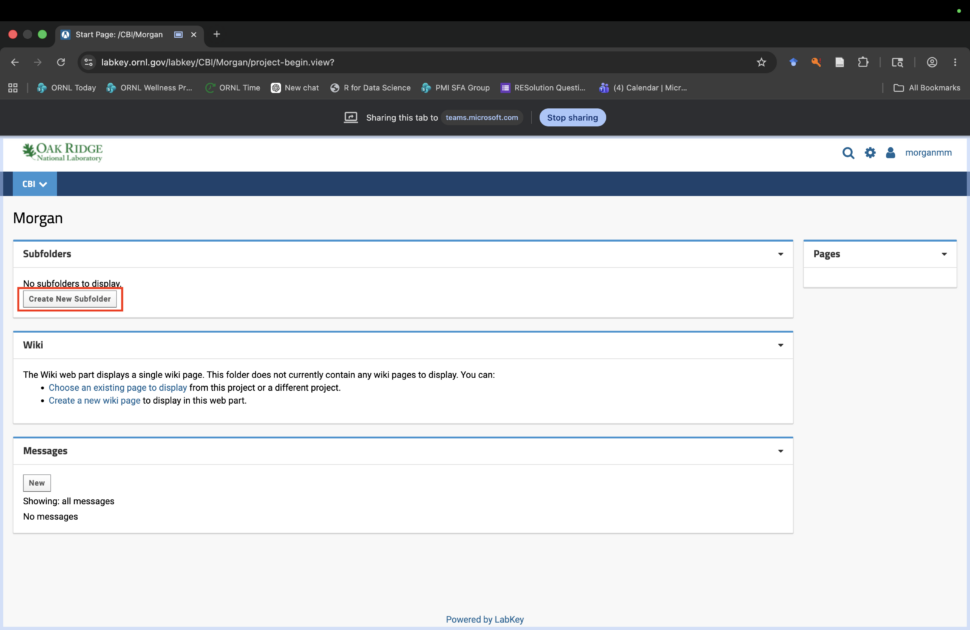
All groups should have a PUBLIC_DATA folder. If you don’t, follow these steps to create one before continuing with Step 2.
Step A: Select Create New Subfolder on the Subfolder page
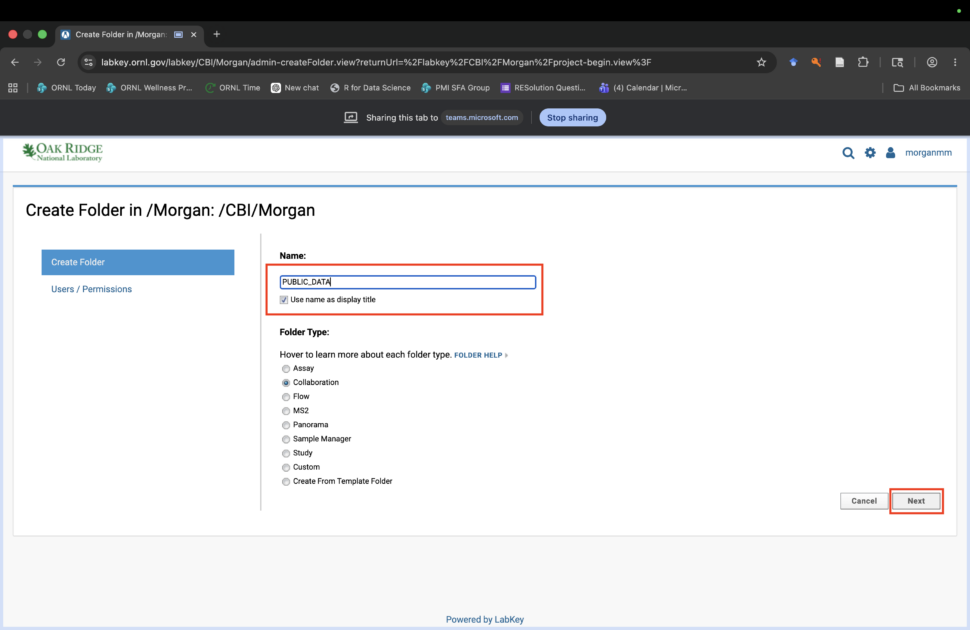
Step B: Name the subfolder PUBLIC_DATA
Click Next when done.
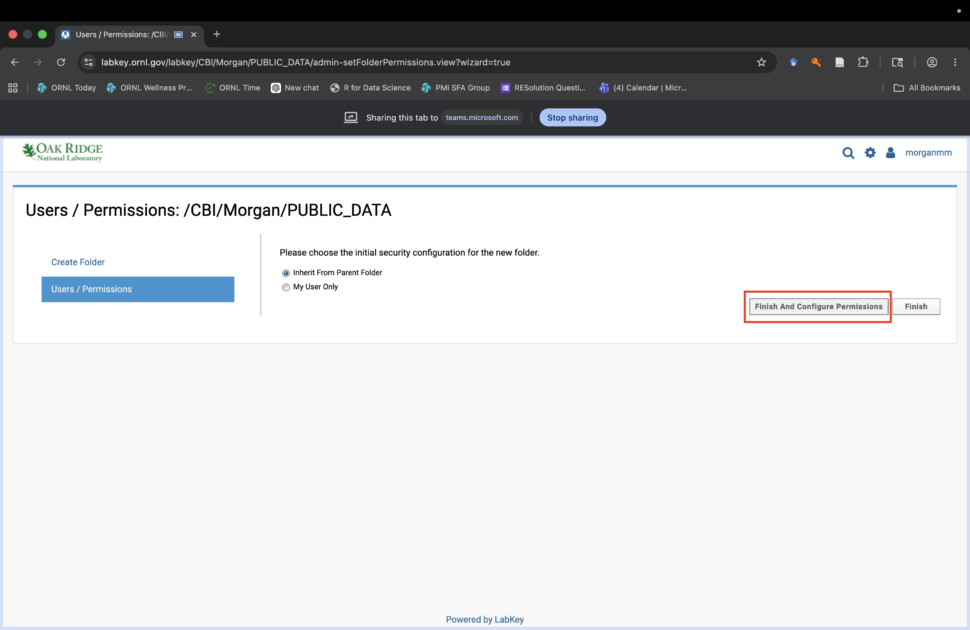
Step C: Start configuring permissions for the folder
Choose Finish and Configure Permissions.
Step D: Remove permission settings from parent folder
Deselect Inherit permissions from parent.
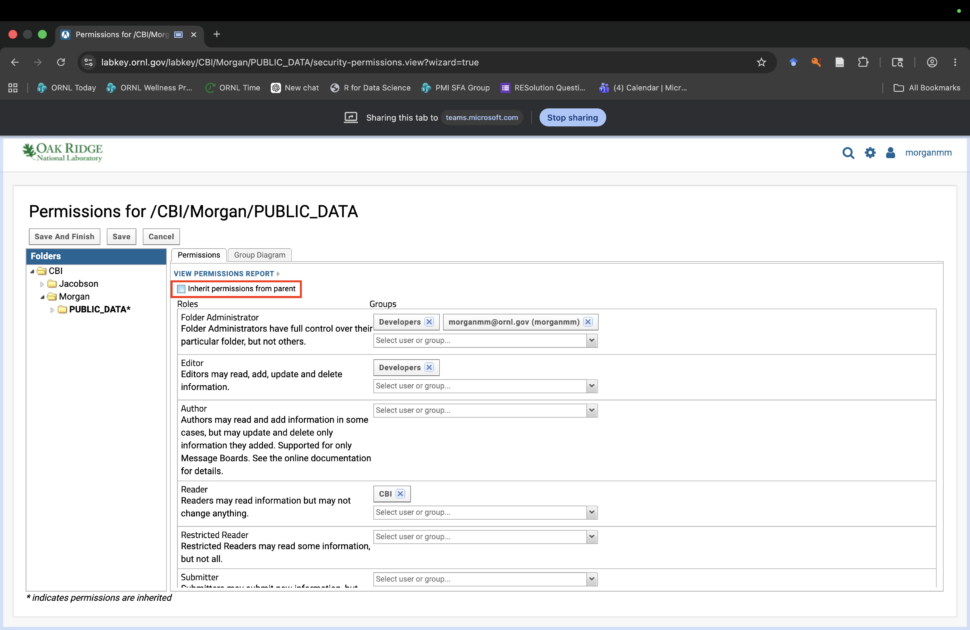
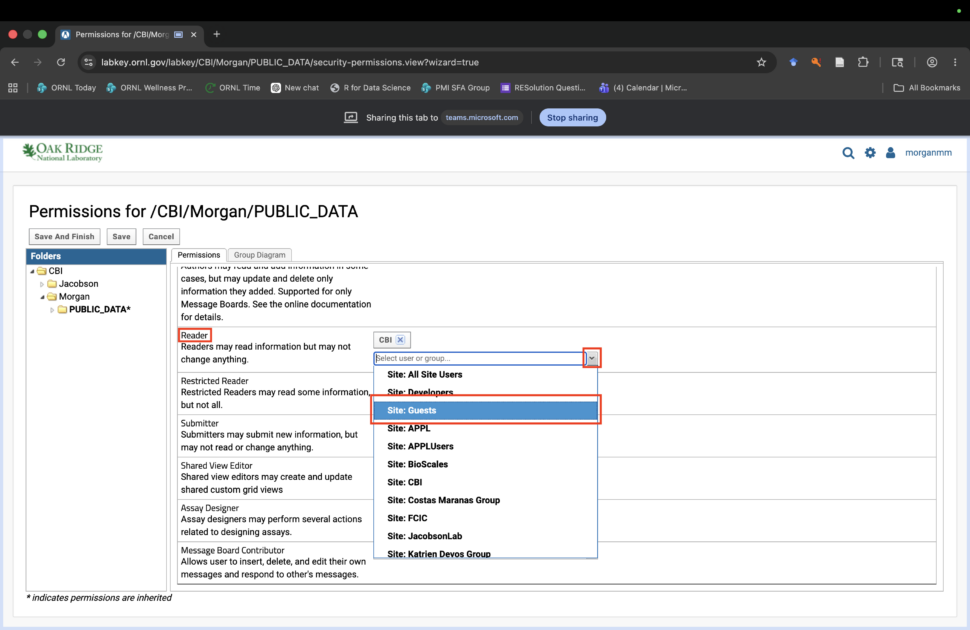
Step E: Allow public reader permissions for the folder
Scroll down to Reader. From the dropdown menu, select Site: Guests. This allows your data to become readable/accessible to the public.
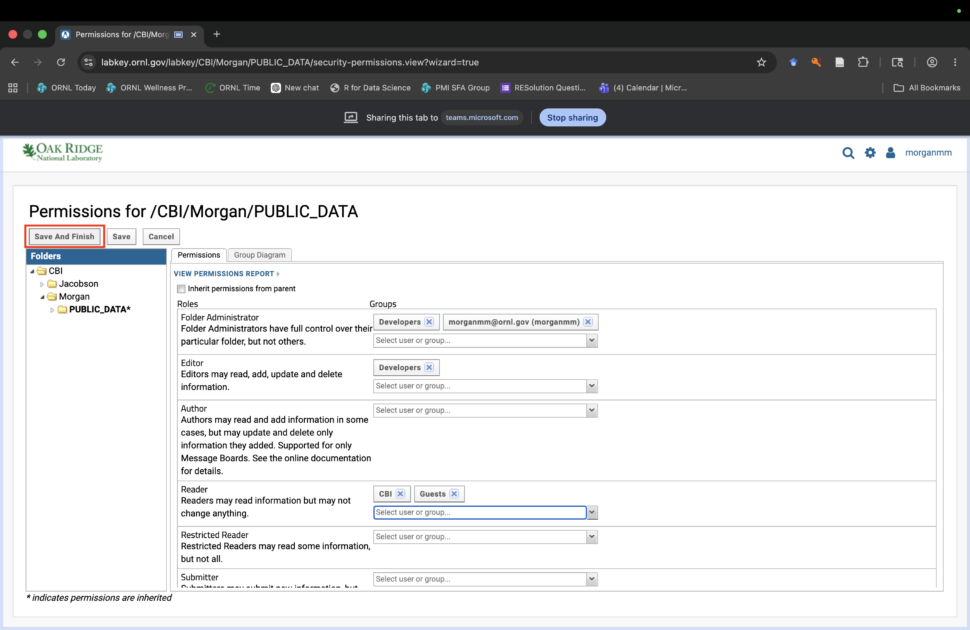
Step F: Save folder permissions configuration
Select Save and Finish.
Once your PUBLIC_DATA folder is created, proceed to Step 2 below.Step 2: Create your project subfolder
This creates the subfolder(s) where your metadata and files will be stored.
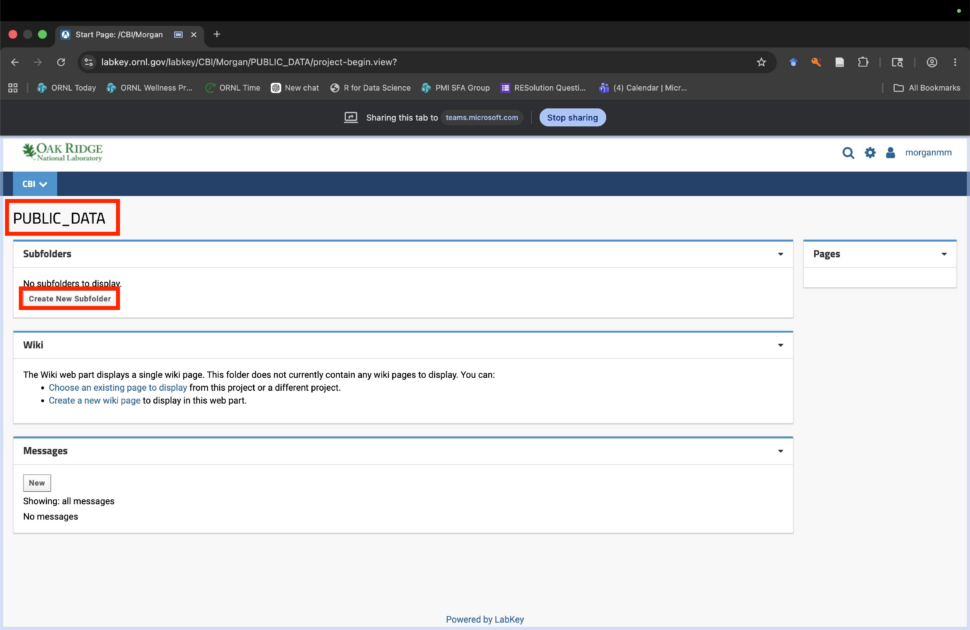
Step 2.1: Enter or create the project subfolder
Once inside your PUBLIC_DATA folder, select Create New Subfolder from the Subfolder page.
Step 2.2: Name your project subfolder
Name your project where you would like to house your data. Collaboration will be automatically selected as the Folder Type. Select Next to proceed to permissions.

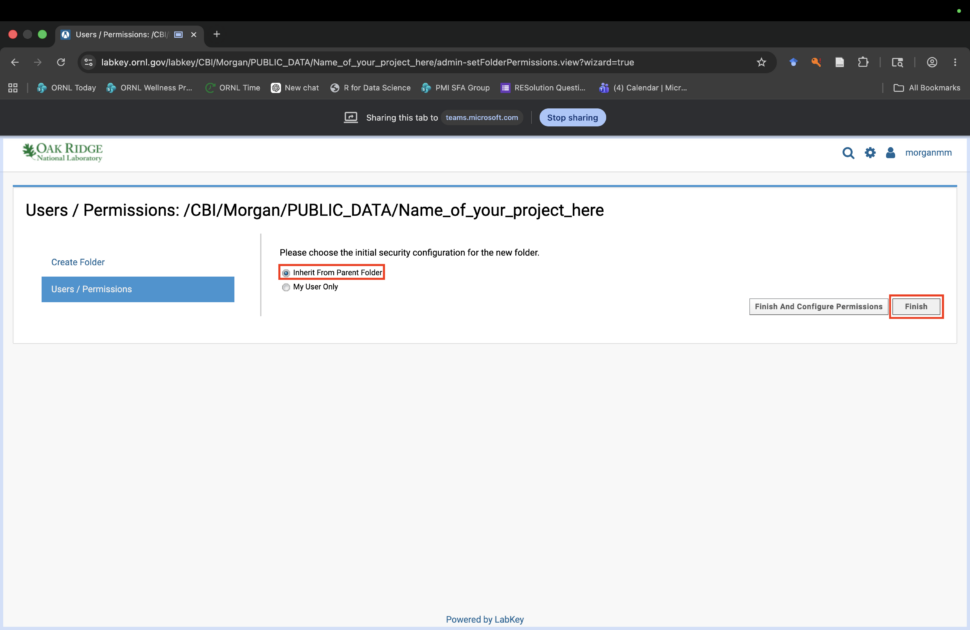
Step 2.3: Select permissions for your subfolder
Inherit from Parent Folder will automatically be selected as the permissions for the subfolder. Select Finish to complete setup. If you would like to create multiple subfolders under one project, repeat this process until you have created the organizational structure of your choice.
Step 3: Set up project subfolder Wiki and File pages
This sets up the structure for your metadata and files.
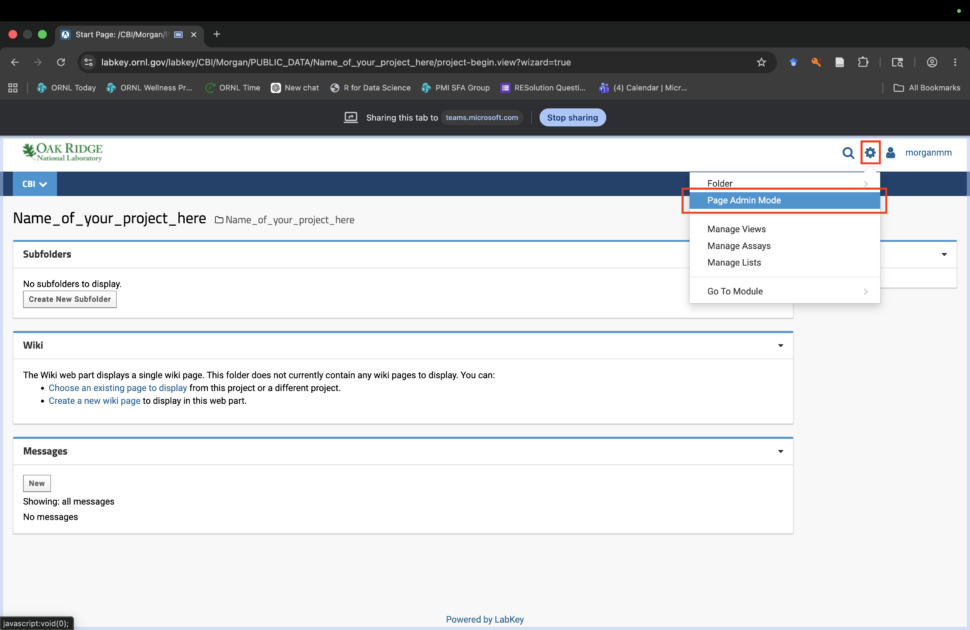
Step 3.1: Enter Page Admin mode
Click the gear wheel on the upper right corner of the page and select Page Admin Mode. If the option is not available from the dropdown, contact Stan Martin ([email protected]) for assistance.
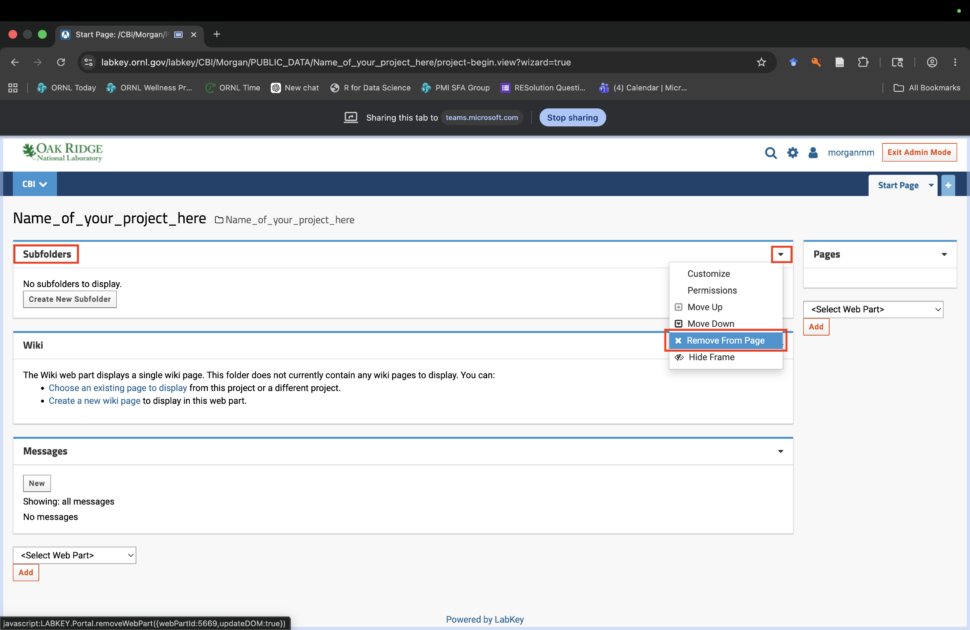
Step 3.2: Remove Subfolders page
Click the small downward arrow on the top left corner of the Subfolders page to remove this page.
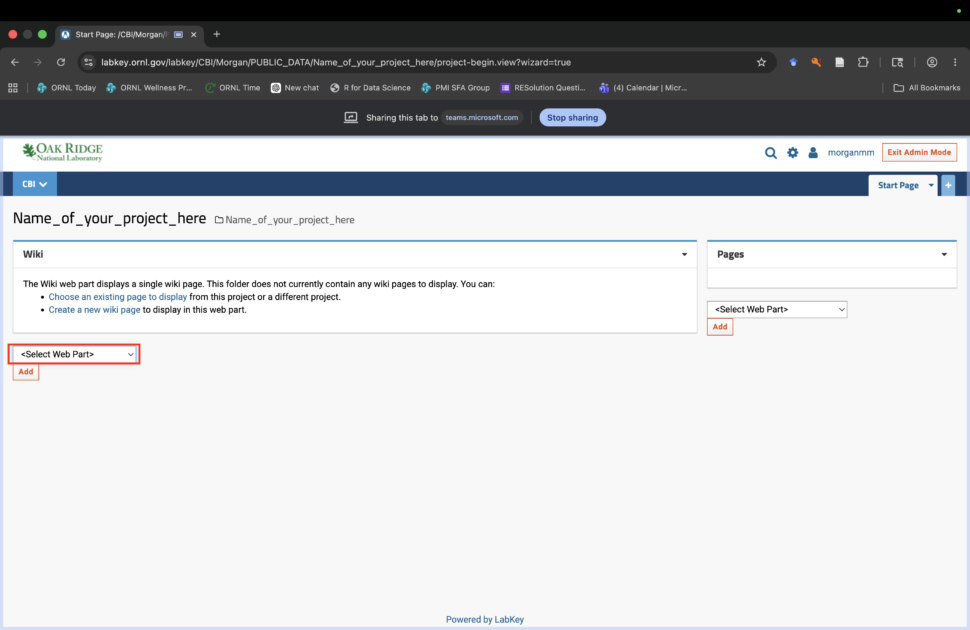
Step 3.3: Remove Messages page
Click the small downward arrow on the top left corner of the Messages page to remove this page. You are now left with just one Wiki page.

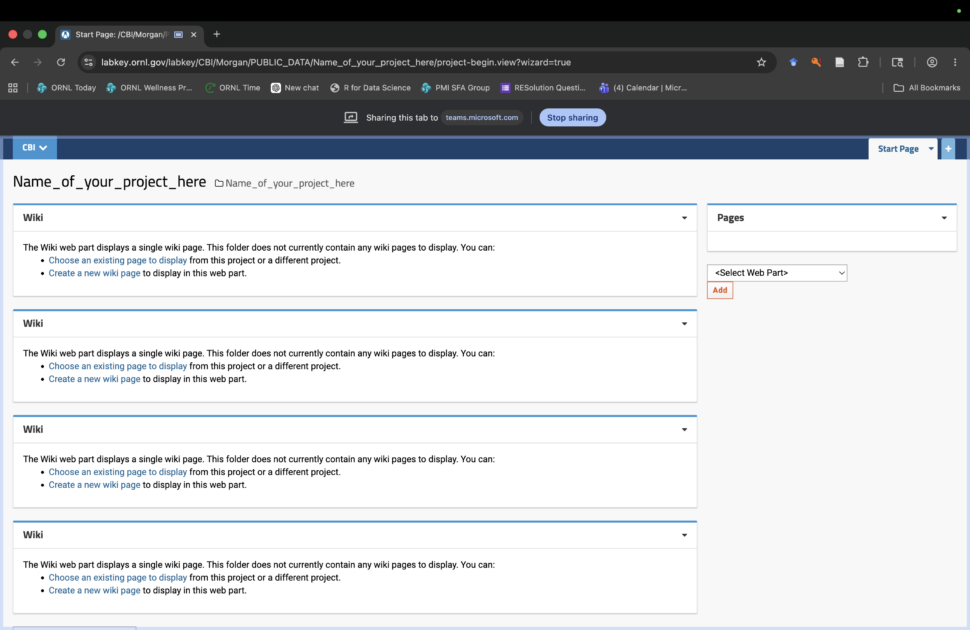
Step 3.4: Create new Wiki pages
Find and click Select Web Part drop down menu below the first Wiki page.
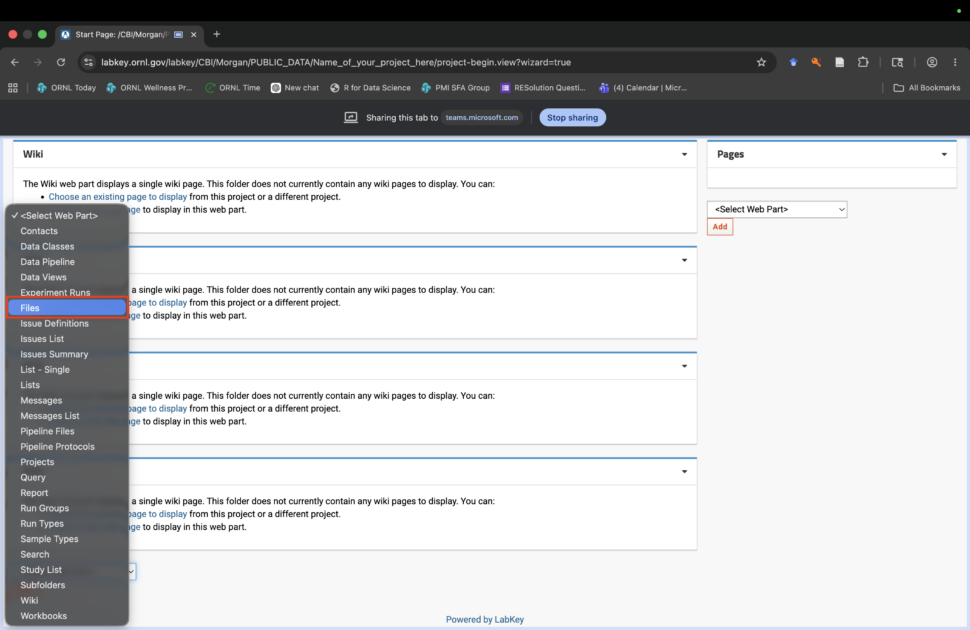
Step 3.5: Create new Wiki pages
Choose Wiki from the drop down menu.
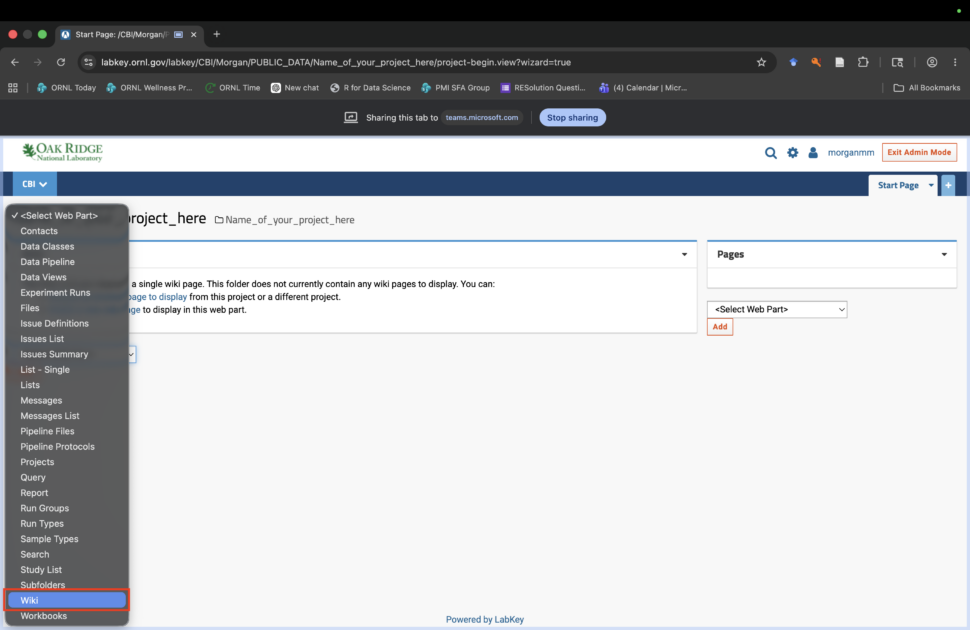
Step 3.6: Create new Wiki pages
Select Add to add a new Wiki page.

Step 3.7: Create new Wiki pages
Repeat this process four times so you have 4 wiki pages.
Step 3.8: Create new File page
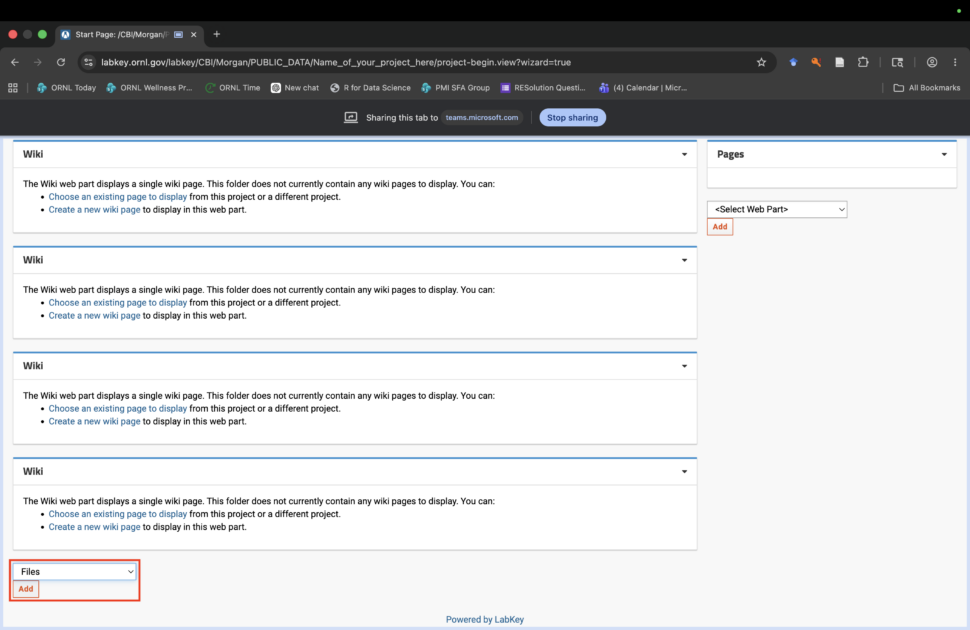
Find and click Select Web Part drop down menu, and this time select Files. Add this web part to your subfolder.
Step 3.9: Create new File page
Finish by selecting Add.
Step 4: Set up project subfolder wikis
Now you are ready to enter your metadata and files. It is essential that all the metadata is entered in the following order: Title, Authors, Keywords, Description. Use the Move Up and Move Down options provided from the top right arrow of the wiki/file pages to ensure this order is followed.
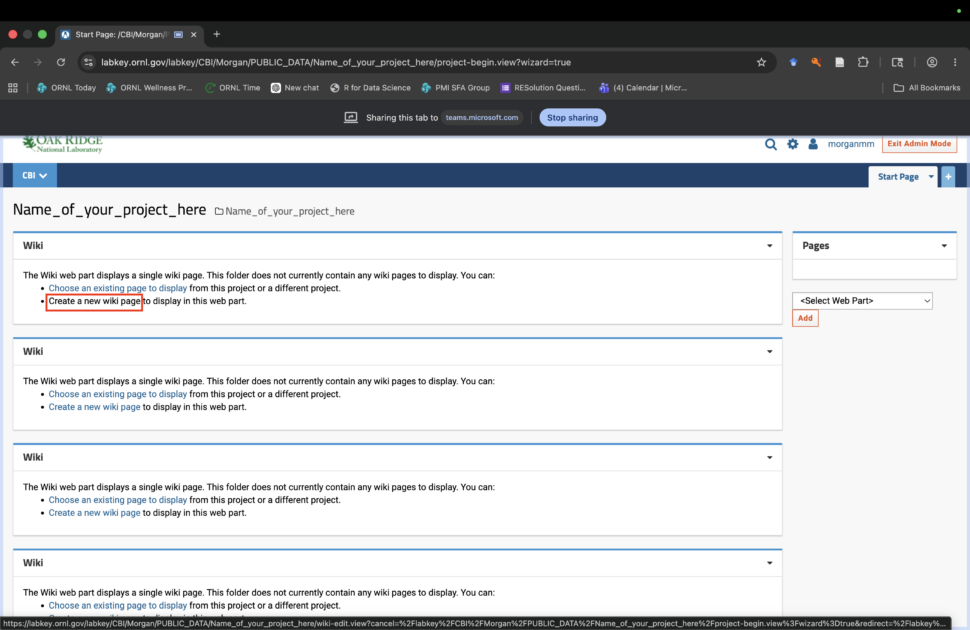
Step 4.1: Create title metadata
Select Create a new wiki page on the first wiki page. This entry will become your title.
Step 4.2: Create title metadata
Under Name and Title, write Title. Under the Visual tab, give your dataset a descriptive title.

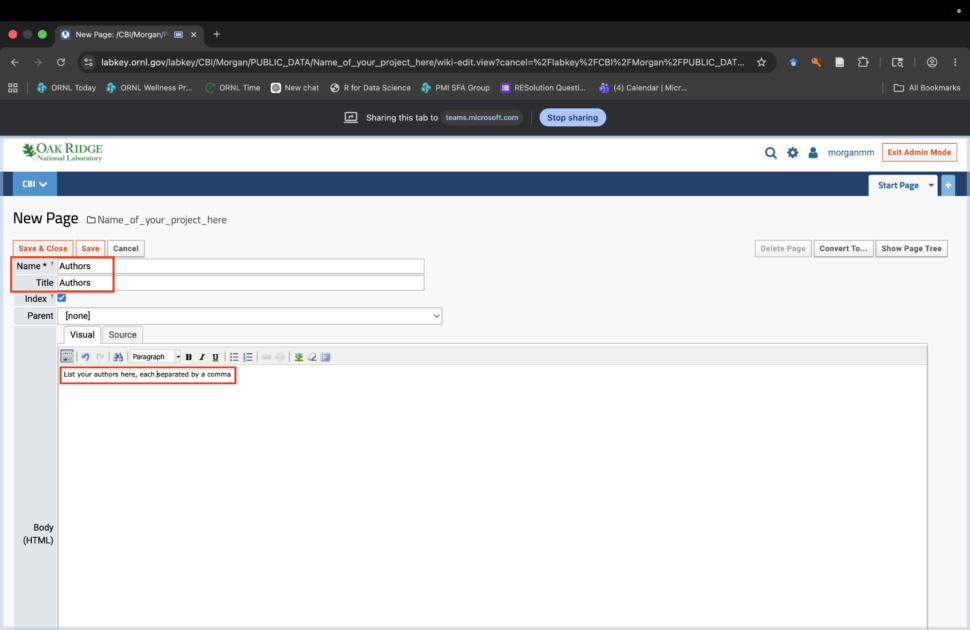
Step 4.3: Create authors metadata
Under Name and Title, write Authors. Under the Visual tab, list your authors (First Last) separated by a comma.
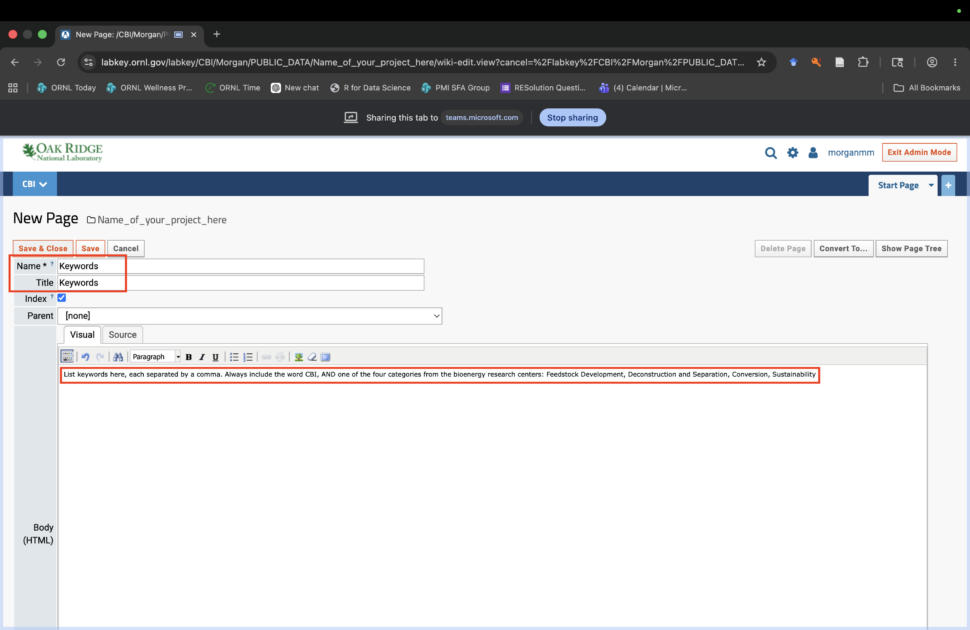
Step 4.4: Create keywords metadata
Under Name and Title, write Keywords. Under the Visual tab, list your keywords separated by a comma. By default, you should always include CBI and at least one of the following: Feedstock Development, Deconstruction and Separation, Conversion, Sustainability.
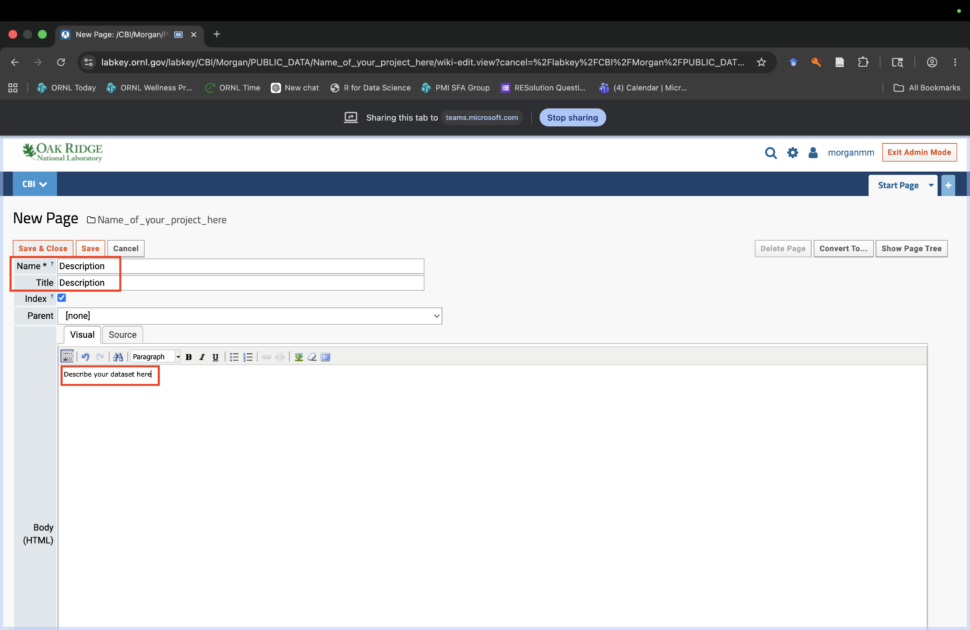
Step 4.5: Create description metadata
Under Name and Title, write Description. Under the Visual tab, describe your data with plenty of detail.
Step 4.6: Check metadata order
Hooray! You have completed your metadata entry. Double check to make sure your metadata is entered in the following order: Title, Authors, Keywords, Description. Use the Move Up and Move Down options provided from the top right arrow of the wiki/file pages to adjust.

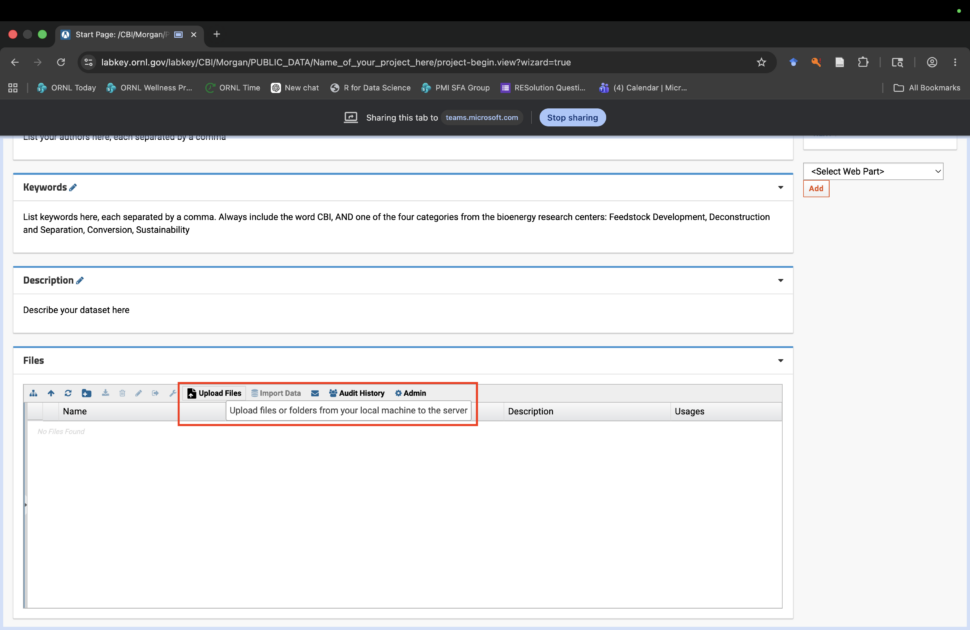
Step 4.7: Add data files
Now, enter your files associated with you metatdata. You can add as many supporting files as you want by either dragging them into the window or selecting Upload Files.
Step 5: Check that your link is publicly available
This will ensure your metadata and files are publicly available and retrievable by Bioenergy.org.
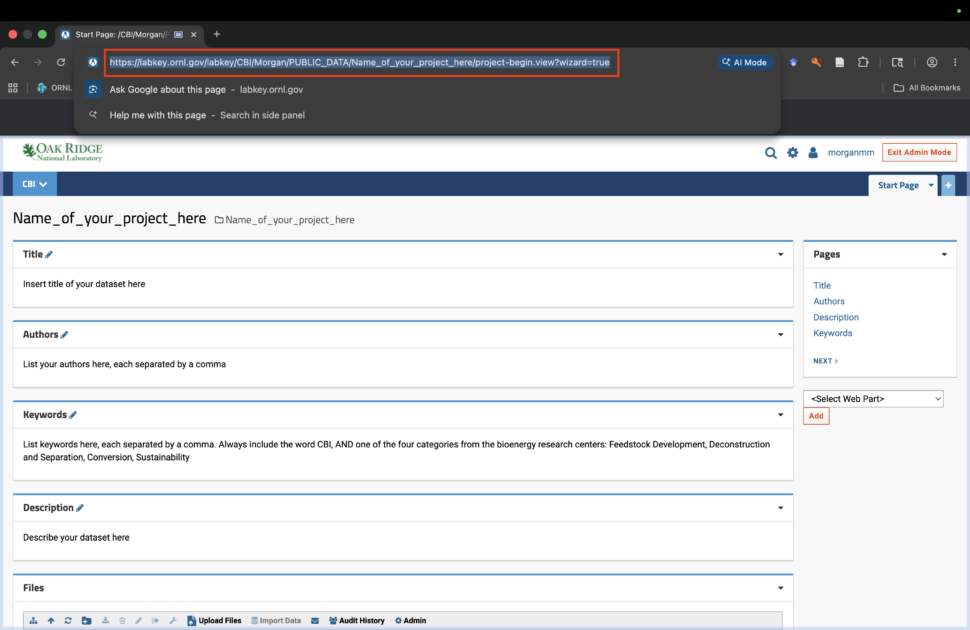
Step 5.1: On your search bar, copy the link from your browser
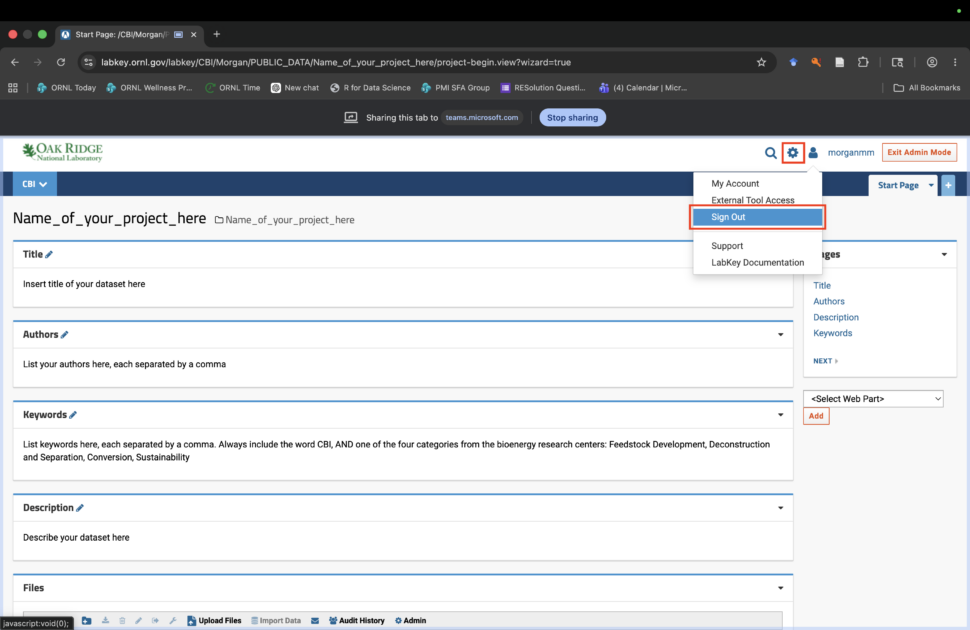
Step 5.2: Sign out of LabKey
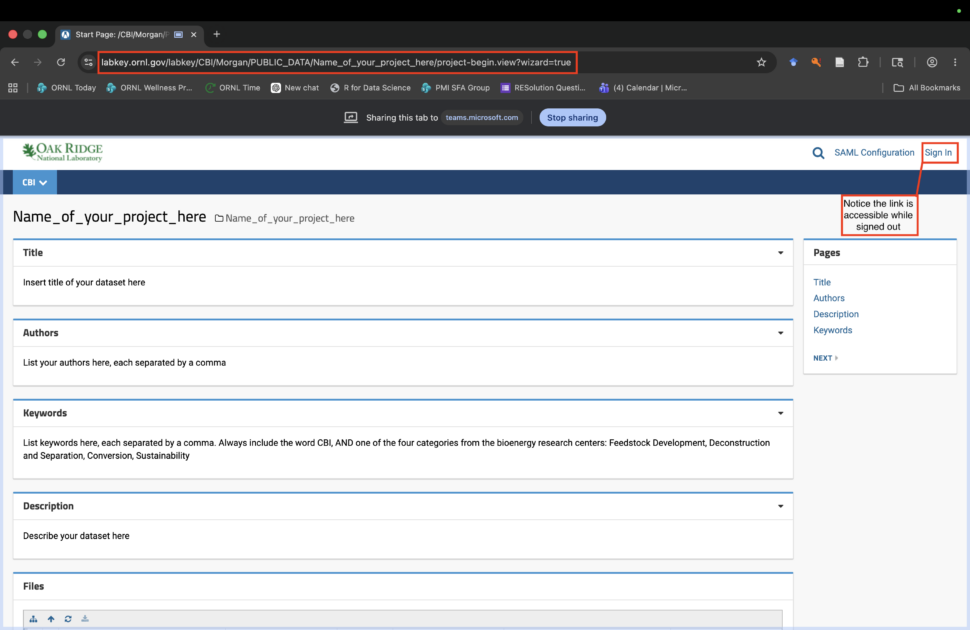
Step 5.3: Paste link in browser and confirm it is accessible
Creating the DOI
Once your data, metadata, and files are entered in LabKey and the link is publicly accessible, copy the url, and send it to Stan Martin ([email protected]) in an email.
Stan Martin will do a quality control check to ensure that all the necessary data and metadata is available, run the submission script for OSTI, and send you back the DOI. The DOI is then available for use in publications that need to reference the dataset.
Once a DOI has been created, the data will be publicly available. It can take up to 72 hours to propagate through servers around the globe, but is usually it is available to ORNL computers within the first day. It is a good practice to check on it periodically until it appears. If it is not visible within 72 hours, email Stan for assistance ([email protected]).
Finding Your DOI
- Go to Bioenergy.org.
- Search for your dataset’s Title (the same title you entered in the metadata).
- Your dataset should appear in the results, with its assigned DOI listed.
- Repeat the steps by searching for the data on OSTI.gov.
Check the link to make sure it is mapping correctly. Use the DOI (not the URL) when you cite it in publications, reports, and proposals. Every DOI you generate adds to your research portfolio, the scientific community, and CBI’s visible research output.